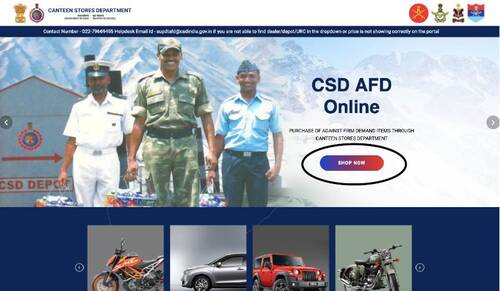
Online AFD Portal to purchase AFD Items: How to register, Check Eligibility etc.
The Armed Forces Personnel and Employees working in various department under Ministry of Defence can purchase AFD Items as per their entitlement through this Online AFD Portal
The process of purchasing AFD Items has been now simplified through this Online Portal. Payment can be made through Online using Net banking, Debit Cards or Credit cards
First complete the registration process at https://afd.csdindia.gov.in/login/ before start purchasing in this AFD Portal
Download Online AFD Registration Manual
Beneficiary Manual
Users are advised to register on the website (https://afd.csdindia.gov.in) first to buy products from AFD-CSD. It is mandatory procedure. You may follow the registration manual for step by step pictorial guide on “new user registration”.
This guide is to help users in placing demands. Here is a detailed step by step pictorial guide:
Login
Step 1: Registered users have to login first to search products and place demand. Click on “SHOP NOW” to login.
Step 2: Enter details to login and click on “Login”.(Fig.2)
Step 3: Same page will reload with OTP verification window. Enter only the OTP, which will be sent on the registered mobile number. (Fig.3)
As soon as you click on “Validate”, page will be redirected to the list of products.
Step 4: Search for the desired products. User have options like following to narrow down their search: (Fig. 4)
1. Search bar
2. Filter by price
3. Sort
4. Manufacturer
Step 5: Highlight the product in which you are interested. Click on “View”.
Step 6: User can now choose more details of the product like color, dealer, depot, and URC.
Price range is mentioned because price of the product is different in every state.
User can view details of the selected dealer(Fig. 7) and URC(Fig. 8).
Step 7: Click “Checkout”.
Note: Users might get any of the following alerts:
A) “You are not entitled to purchase the selected car”.
This occurs when the entitlement (Fig.10) of the officer doesn’t allow purchase from that price range.
B) “You are not entitled to purchase a car as you have not completed five years of service”. (Fig.10)
This occurs when the user haven’t completed 5 years of service. User can only buy products after completing 5 years of service.
Step 8: You will be redirected to the “Checkout” page. (Fig. 13) This page has 3 sections:
a) Pre-filled section (Fig. 14) The data in this section is fetched from the registration form and it cannot be changed.
b) Yet to be filled section
User will have to upload the documents and the requested data. No serving document should be uploaded until specified.
c) Payment Details/Summary
Depending upon the state/price zone you choose “tax class” will be implemented. For eg: For Delhi region, tax class-8 is used.
Note: Please take care of the following things:
A) The “Dealer Price” (Fig. 16) and “Net price to be Paid” (Fig. 16) should be exactly same otherwise an alert will be generated (Fig. 18) preventing generation of demand.
B) Users can only buy a product once in the specified period. For eg: a car can only be bought once in 5 years by 1 officer. Also, it cannot be transferred for the specified time.
If “Yes” is selected then only the Date of last purchase of Ibid item” is asked.
C) If users have opted for loan in checkout form (Fig.21) then loan amount will have to be mentioned and sanction letter will also have to be uploaded.
D) There are 2 ways of making payment:
i) Direct Bank Transfer
Once the checkout form is submitted, banking details will be displayed. (Fig.19). User will made the payment and upload the receipts & details (Fig.21) under the demand tab. (Fig.20)
Make sure to enter the amount correctly otherwise an alert will be generated (Fig.22). In case of loan, loan amount + amount transferred should be = the total amount.
ii) Through Payment Gateway/ Online payment
This method can only be used if loan is not availed.
In this method no receipts have to be uploaded, Razorpay (the payment gateway) will keep records in NOTES.
Once the form is submitted, a pop-up form (Fig.23) will come up. Enter the details and proceed further.
Fig.24 explains all the possible ways of making payment for the product.
In case of,
Direct Transfer: Demand will be submitted to the depot automatically after uploading payment details.
Payemnt Gateway: Demand will be submitted to the depot automatically after successful payment.
Users can monitor the status of the order under Menu -> Demand tab.
Meaning of the status are as follows:
| Status | Meaning |
| On hold | Payment Receipts needs to be uploaded |
| Payment Pending | Payment pending |
| Processing | Pending on Depot |
| Supply Order Issued | Pending with URC |
| Delivery completed | Product has been delivered by the dealer |
********************************


COMMENTS